
Recipe book
How to create and manage a recipe book in Chef Notepad
A recipe book is the easiest way to keep every recipe your kitchen uses in one tidy place. You can build one book for a whole restaurant, listing everything the team cooks, or, if your kitchen is bigger, break it into several books by section, whatever suits the way your kitchen is organised. Once it is built, you can print it, share it with your team as a link, or duplicate it as the starting point for your next book.
This guide walks you through the whole process, from creating your first book to using the recipe book dashboard. Our example is a pub called Johnny’s Pub, with a cold section and a hot section.
Creating your recipe book
2 min read
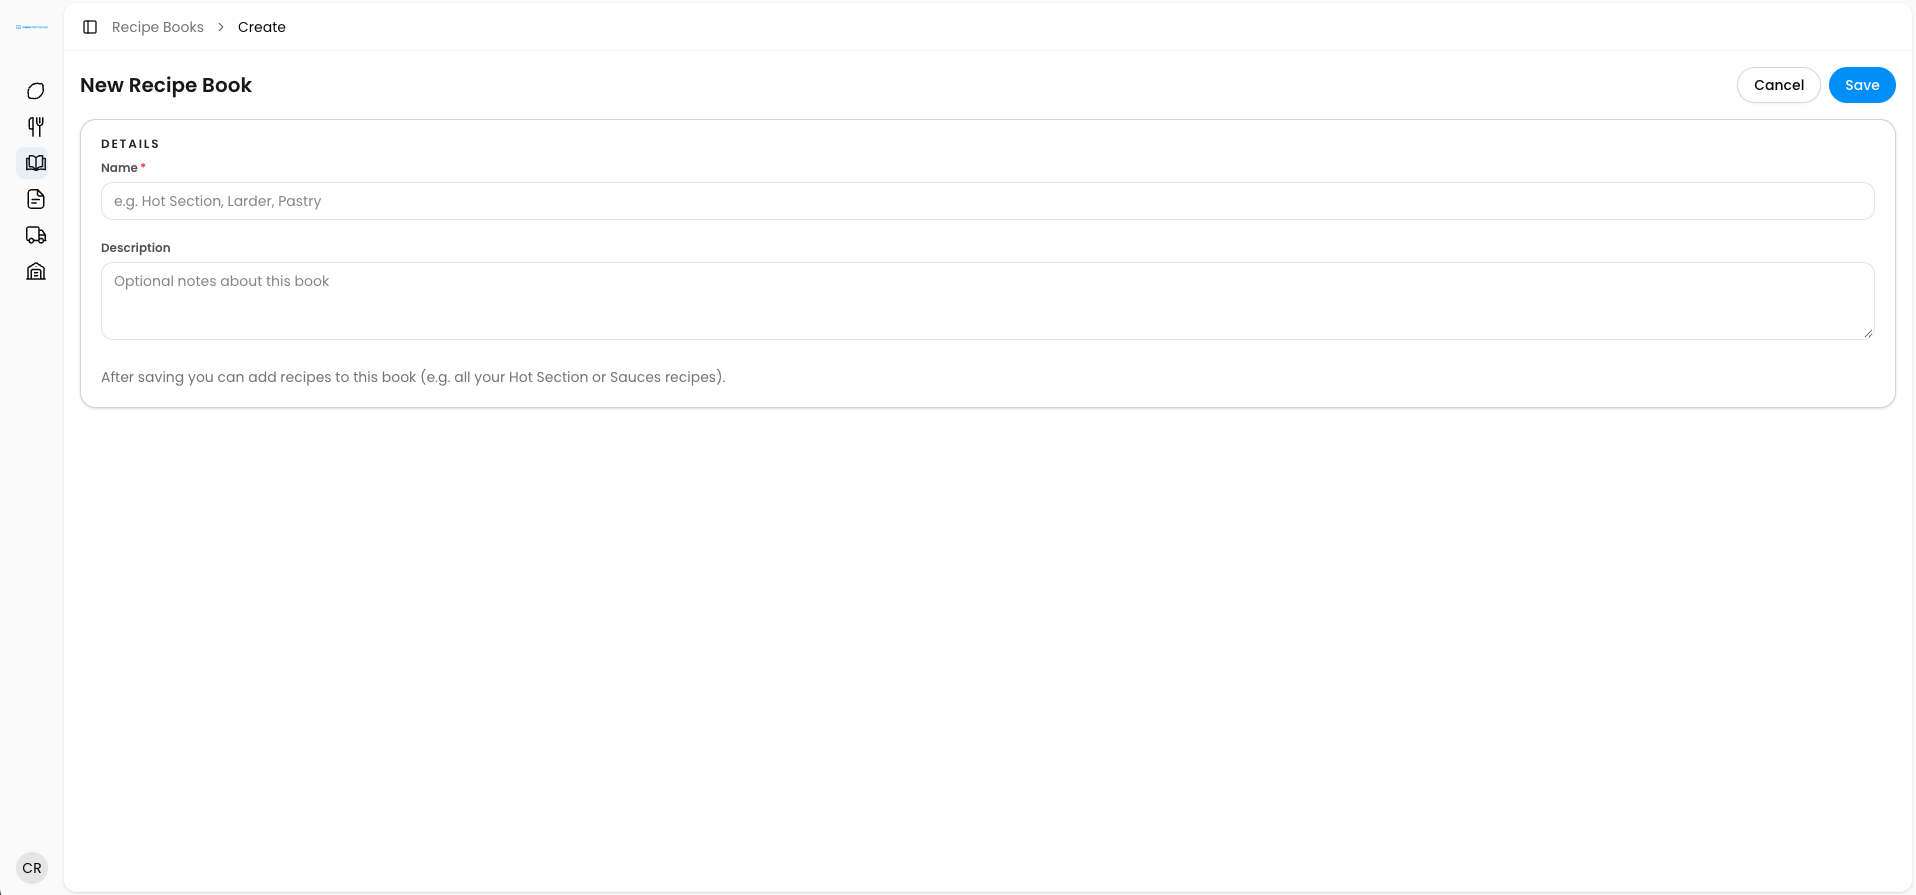
1. Open the Recipe Book section. From the menu on the left-hand side, click Recipe Book. This is where all of your books live. Click Create Recipe Book to start a new one.
2. Give your book a name. Choose something that tells your team at a glance what the book covers. If you are using one book for the whole kitchen, the name of the venue works well, for example Johnny’s Pub. If you are splitting a large kitchen into sections, you could name each book after its section instead.
3. Add a description. This is a free text field, so write whatever helps you remember what the book is for, for example Summer 2026. It also shows up in your recipe book dashboard later, which makes similar books easy to tell apart.
4. Save your book. Click Save on the right-hand side. Changed your mind? Click Cancelinstead. Once you save, Chef Notepad opens the recipes page for your new book, ready for you to start filling it.
Next: Learn how to Adding recipes and sections to your recipe book, Viewing your recipe book, Printing your recipe book, Duplicating/Sharing your recipe book as a link and Using the recipe book dashboard
Questions? Get in touch
Adding recipes and sections to your recipe book
2 min read
Now for the fun part, filling your book. You can add recipes straight in, or group them into sections, such as a cold section and a hot section, so the book mirrors how your kitchen actually runs.
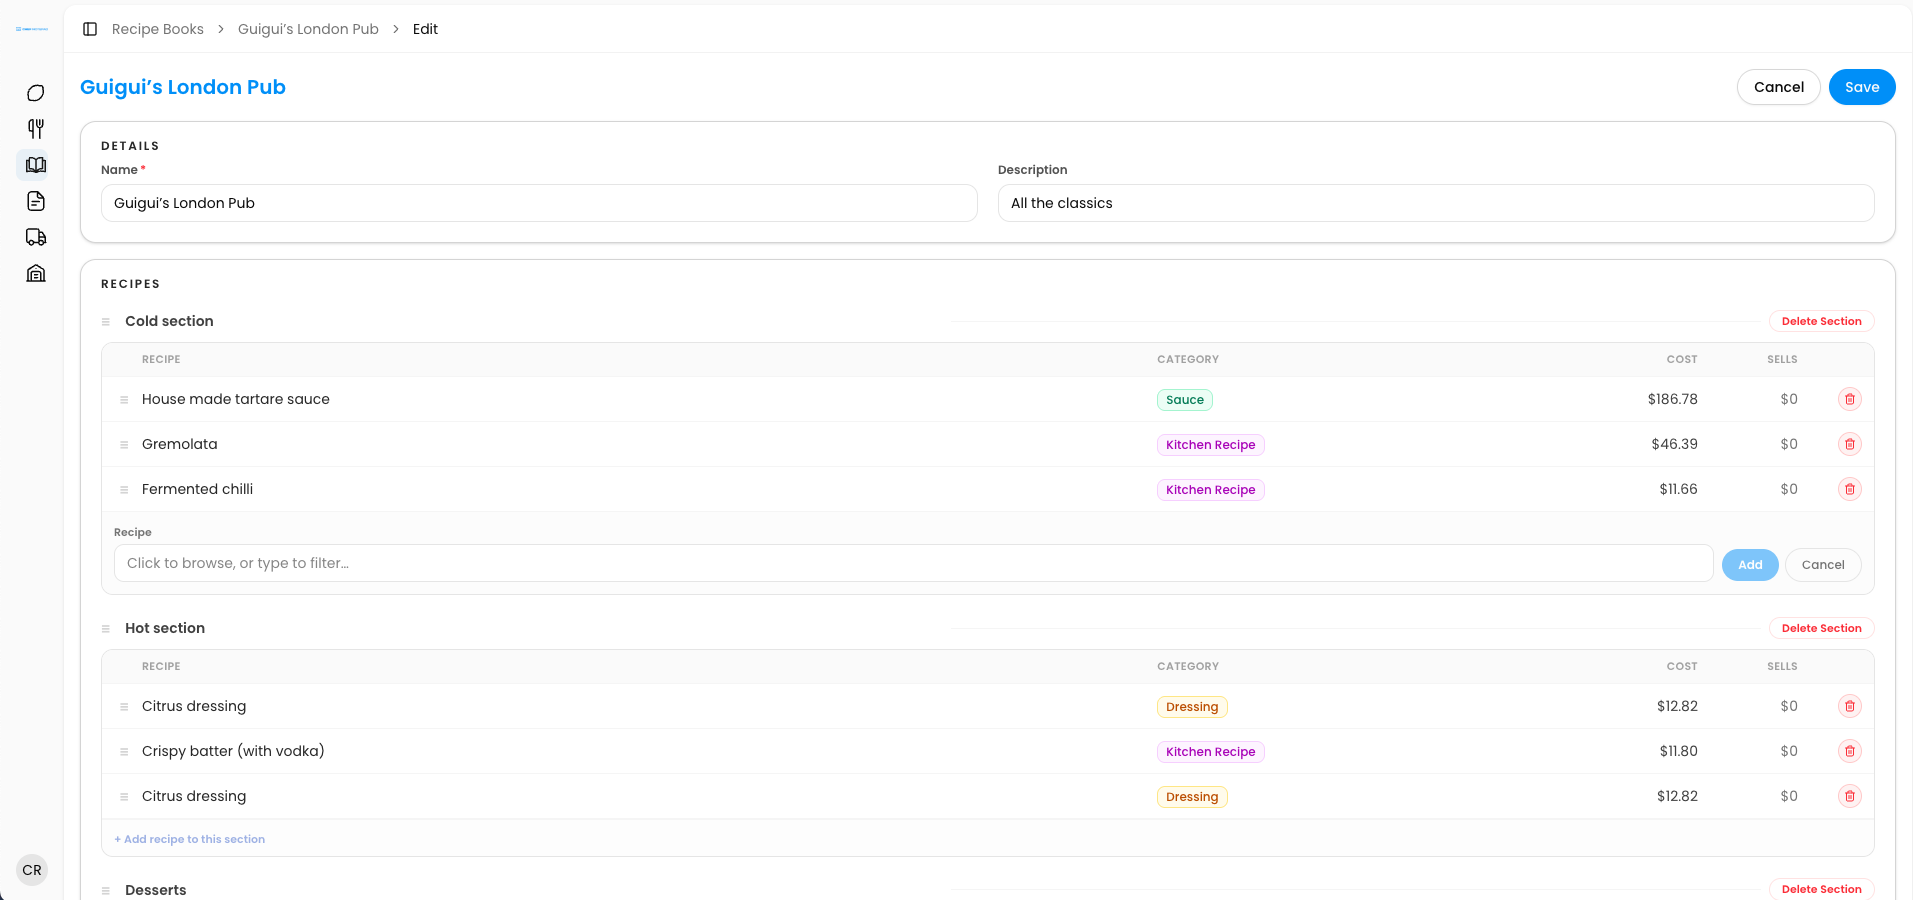
1. Add your first recipe. Click Add Recipe. A dropdown opens with all of your recipes. Scroll to find the one you want, or start typing its name and the matching recipes will appear in alphabetical order as you type. Select the recipe to add it to your book.
2. Create a section. If you want to organise your recipes into groups, click Add Sectionand give it a name. In our example, the first section is called Cold Section. Sections are especially handy for larger kitchens, where different stations work from different parts of the book.
3. Add recipes to a section. Within the section, click Add Recipe to this section, then search for or select the recipe you want from the dropdown. Repeat this for every recipe that belongs in that section.
4. Add more sections. Click Add Section again to create the next one. In our example, the second section is called Hot Section, and we add its recipes the same way.
5. Rearrange when you need to. Changed your mind about where a recipe belongs? Simply drag and drop it from one section into another. You can also delete a sectionat any time if you no longer need it.
6. Save your changes. When you are happy with the way your book looks, click Save.
Next: Learn how to Viewing your recipe book, Printing your recipe book, Duplicating/Sharing your recipe book as a link and Using the recipe book dashboard
Questions? Get in touch
Viewing your recipe book
2 min read
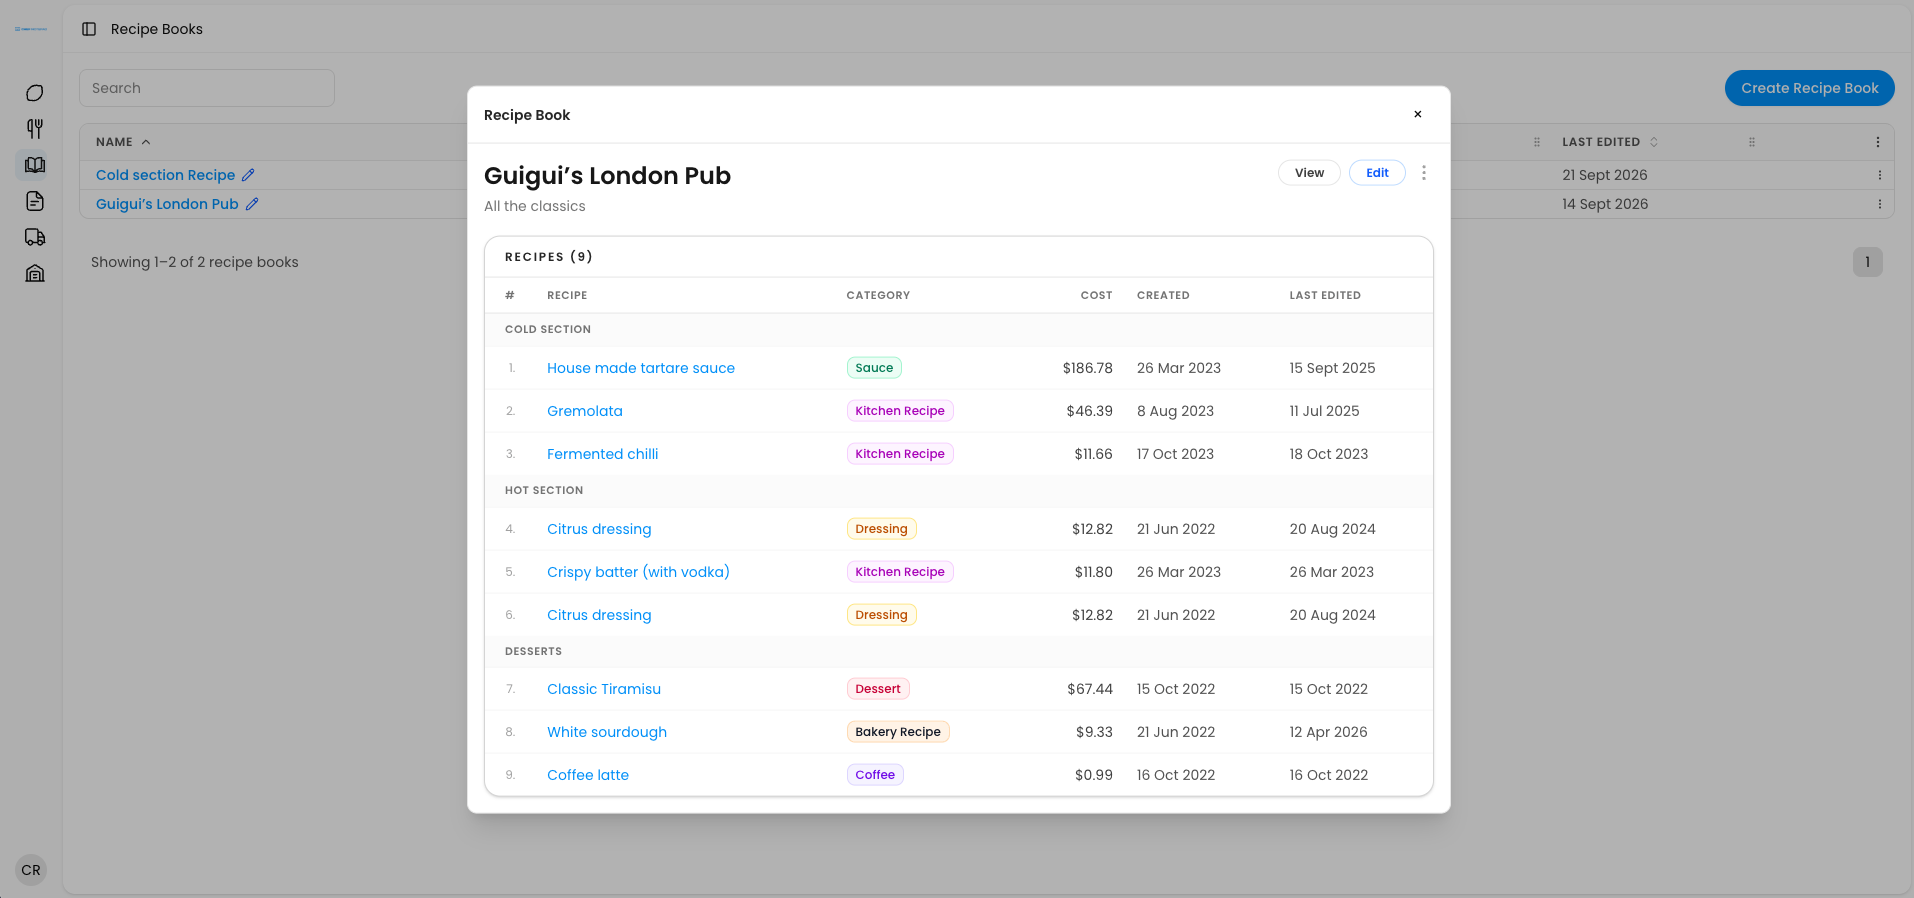
Once your book is saved, you will see every recipe listed with its cost, the date it was createdand the date it was last edited. That gives you a quick overview of your kitchen’s recipes and what each one costs, all in one place.
Click on any recipe in the book to open it. You will see all of its information, and you can scale it up or down exactly as you would from the regular recipe view.
Next: Learn how to Printing your recipe book, Duplicating/Sharing your recipe book as a link and Using the recipe book dashboard
Questions? Get in touch
Printing your recipe book
2 min read
Want to see how your book will look on paper before you print it? The view option shows you the full layout exactly as it will come out of the printer, and lets you decide what goes on the page.
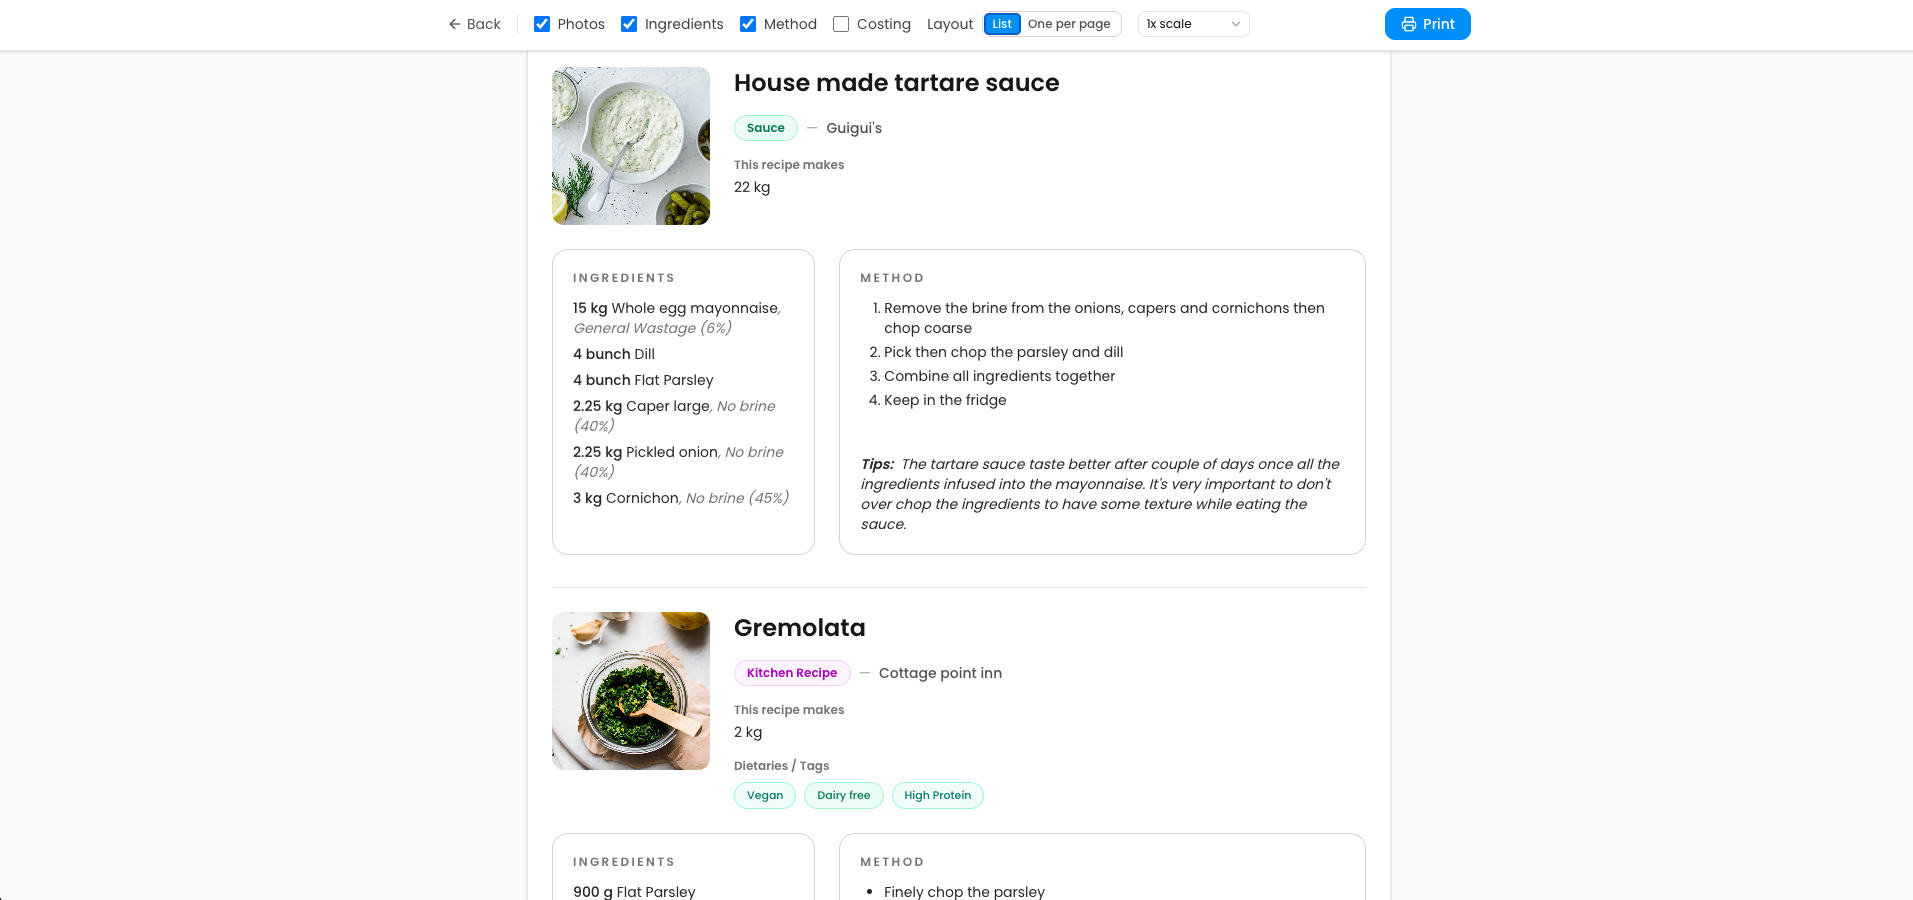
1. Open the view. Click View to see your recipe book laid out as it would print.
2. Choose what to include. Tick or untick photo, ingredients, method and costing. For example, if you do not want costs visible on a printed copy that is going up in the kitchen, just untick costing. The same goes for the photo, the ingredients or the method.
3. Pick a layout. Choose List for a compact printout, or One per page if you would like each recipe on its own page.
4. Print. Click Print and your book is ready for the kitchen.
Next: Learn how to Duplicating/Sharing your recipe book as a link and Using the recipe book dashboard
Questions? Get in touch
Duplicating/Sharing your recipe book as a link
2 min read
Sometimes you want to send a book to someone without printing it, like a new team member, a head chef at another site, or a business partner. A share link lets anyone with the link open the book on their phone or computer, and it works the same way as sharing a single recipe.
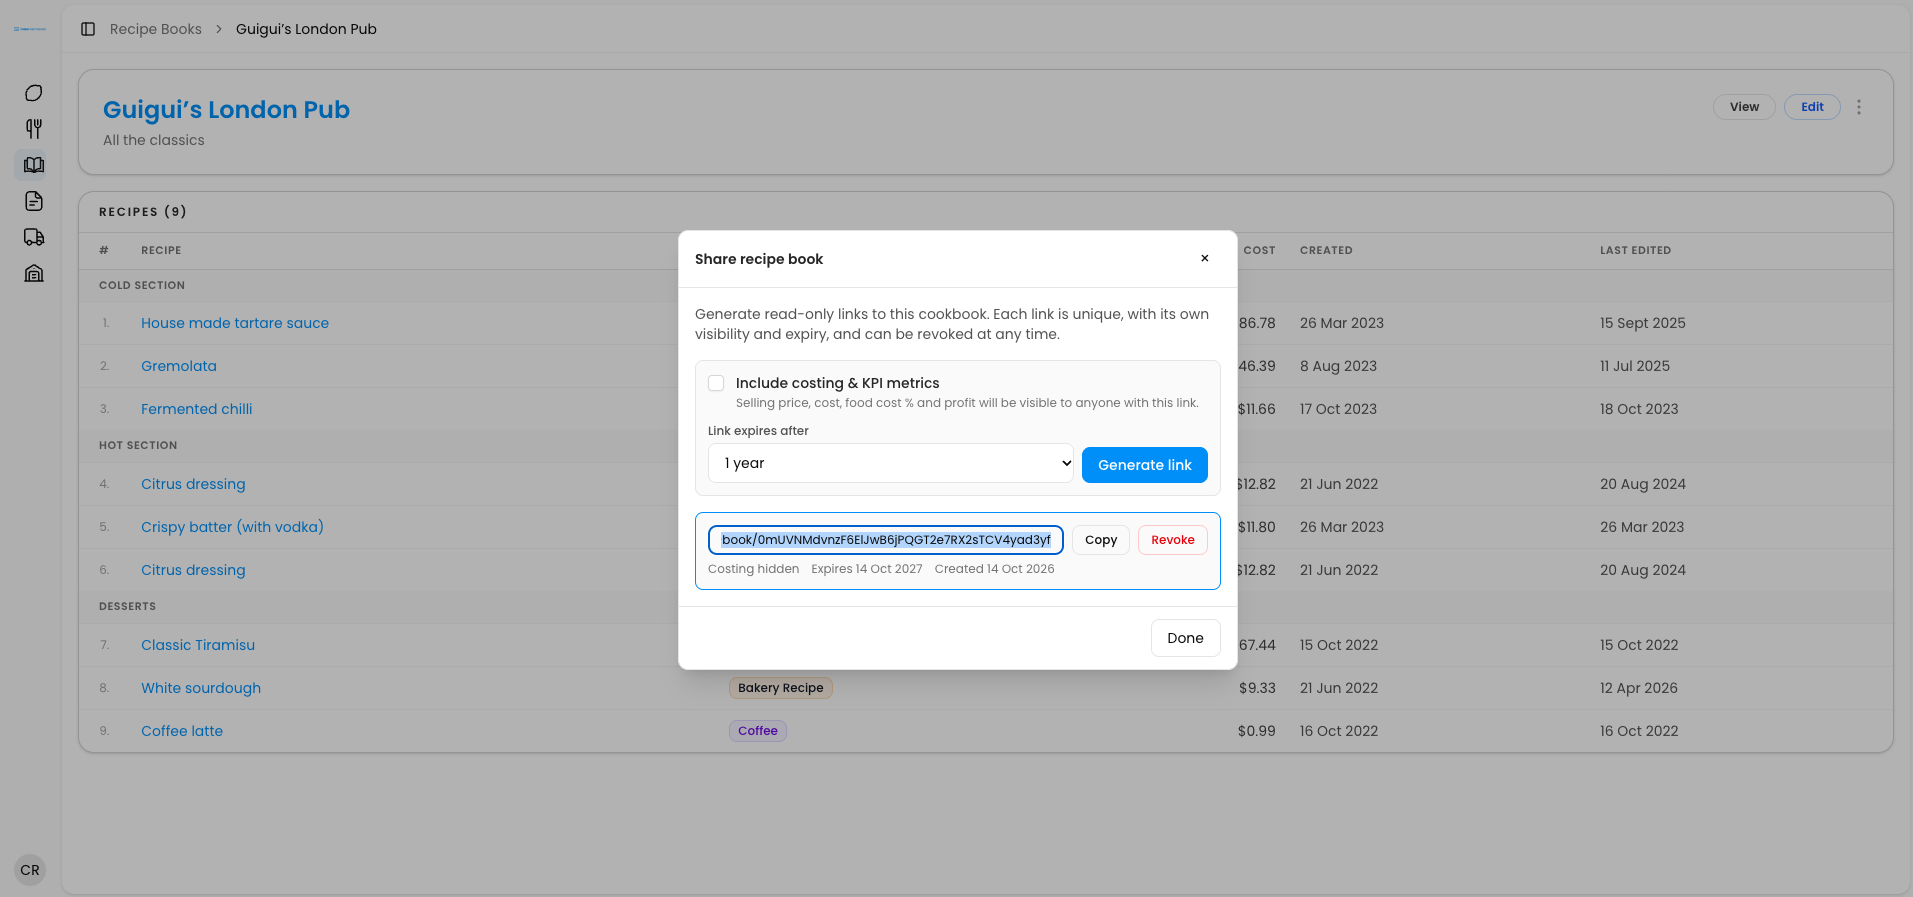
Sharing a recipe book
1. Click Share link.
2. Choose what to share. Decide whether to include costing and KPI metrics. If you only want your team to see the recipes and not your margins, leave them out.
3. Set an expiry. Choose how long the link should work: 1 day, 1 week, 1 month, 1 year, or never.
4. Generate and send. Click Generate link, copy it, and send it by email, text or WhatsApp.
You can revoke a link at any time, even one that was set to never expire, so you stay in control of who can see your book.
Duplicating a recipe book
Building a new book that is similar to an existing one, for example a winter edition of your summer book? You do not need to start from scratch. Use the Duplicate option to make a copy of an existing recipe book, then adjust the name, description and recipes as you need.
Next: Learn how to Using the recipe book dashboard
Questions? Get in touch
Using the recipe book dashboard
4 min read
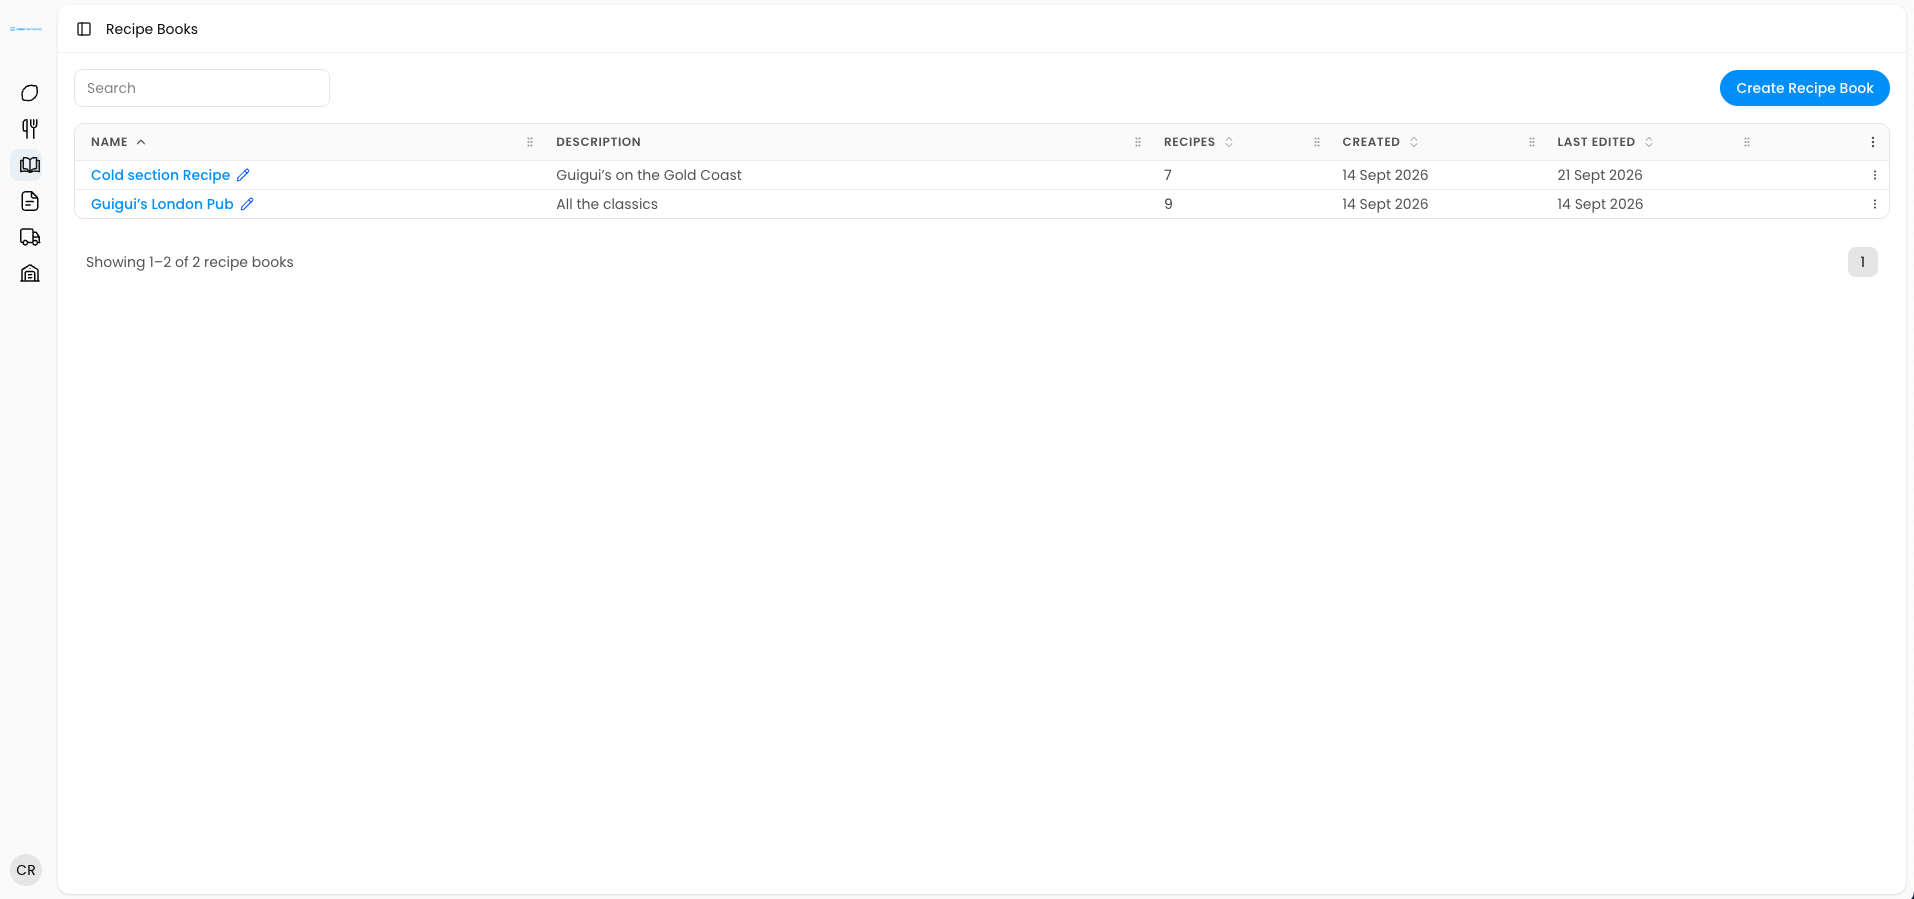
• Rearrange columns: drag the column headers to put them in the order you prefer.
• See the essentials: each book shows its description, the number of recipes it contains, when it was created and when it was last edited.
• Edit a book: click the pencil icon next to it.
• Open a book: click the name of the recipe book to view the whole book.
And that is everything you need to know about recipe books, from creating one and organising it into sections to printing, sharing and duplicating it.
Questions? Get in touch